If you are planning a new facility and comparing delivery options, modular steel buildings give teams a configurable path from idea to occupancy. Owners, developers, and public agencies choose modular steel buildings to combine factory-built precision with on-site flexibility, shorten schedules, and keep long-term care straightforward. This guide organizes the major decisions—scope, codes, structure, envelope, systems, foundations, procurement, logistics, budgeting, sustainability, and maintenance—so you can move through each stage with fewer surprises.
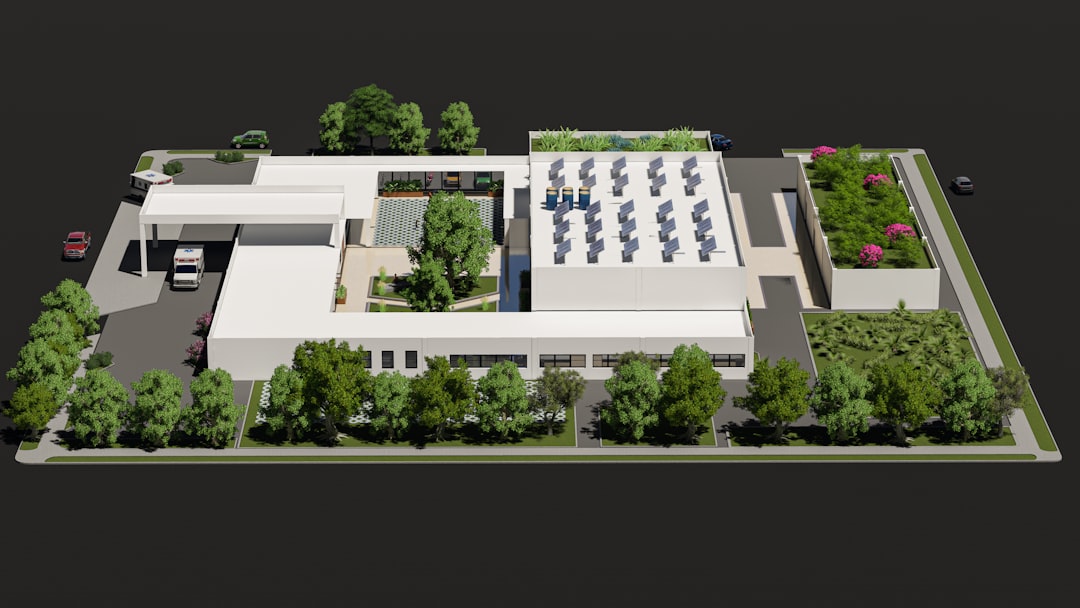
The business case for modular steel buildings
Steel has anchored commercial and industrial construction for decades. What has changed is the maturity of off-site fabrication, panelized envelopes, and standardized connections that allow teams to assemble a building from a kit of proven parts. The result is faster mobilization, clearer pricing, and fewer field variables. With modular packages, engineering energy is focused on what truly varies—site conditions, environmental loads, opening sizes, equipment support, and local code requirements—while the rest follows time-tested details.
Common advantages cited by owners and builders:
- Schedule compression: Fabrication can run in parallel with sitework and foundations, shrinking the time between notice to proceed and dry-in.
- Cost clarity: Standardized frames, purlins, girts, and panel packages reduce unknowns, which stabilizes budgets earlier.
- Consistent quality: Shop welding, drilling, and coating occur in controlled environments with repeatable inspections.
- Adaptability: Bolted connections, removable cladding, and modular bays make future expansions and interior reconfiguration more practical.
- Lower site risk: Less field welding, less crane time, and shorter weather exposure windows can reduce incident risk and rework.
Use cases range from light manufacturing, logistics hubs, and vehicle maintenance shops to community recreation, retail boxes, office-support flex spaces, ag buildings, and cold storage. Architectural expression remains open: insulated metal panels (IMPs) blend well with masonry veneer, fiber-cement, glazing, canopies, and signage to achieve the desired brand and streetscape presence.
Define the program and site constraints early
Short, decisive planning documents help every downstream choice. Start with a one-page owner’s project requirements (OPR) that lists the metrics that matter: target clear height, typical bay size, column spacing goals, door and dock counts, roof and floor live loads, special loads (bridge cranes, monorails, conveyors), and any unique spaces (wash bays, paint booths, negative-pressure rooms, labs, or clean zones). Map material flows for trucks, forklifts, people, and waste so openings, canopies, and staging areas land where they add the most value.
Pair the OPR with site due diligence. Order geotechnical borings early to understand bearing capacity, groundwater, frost depth, and variability across the footprint; these data drive slab thickness, subbase prep, and whether piers or ground improvement are warranted. Confirm zoning, setbacks, height limits, easements, fire access, and utility capacity (three-phase power, gas, water pressure, sewer, and communications). If wetlands, floodplains, or protected trees are present, initiate environmental reviews early so they do not delay steel release.
Turn discovery into a simple matrix your team can share:
- Constraints: setbacks, height limits, truck approach geometry, soils, flood elevation, and required off-site improvements.
- Opportunities: south-facing roofs suited to solar, existing grade aligned to dock height, prevailing winds aligned with intake/exhaust, or shared access with adjacent parcels.
Clarity at this stage pays dividends. Suppliers can size frames accurately; civil and structural engineers can coordinate foundations and paving with confidence; and your permitting plan can follow a realistic timeline. Decisions made early with good information tend to lower lifecycle cost by reducing redesign and field rework.
Codes, permitting, and your compliance roadmap
Modular delivery does not change your obligations under the building code; it streamlines how you satisfy them. Begin by documenting the governing code edition (for example, IBC 2021) and all referenced standards you expect to apply (AISC, AISI, ASCE 7, NFPA for fire and life safety, and local energy codes). Establish the project’s design wind speed and exposure category, roof snow loads (balanced and unbalanced), seismic design category, and importance factors. Record local amendments that differ from the base code, especially in high-wind, heavy-snow, or high-seismic regions.
Create a permitting roadmap with milestones and typical durations:
- Pre-app meeting: Share massing, site access, and use type; align on required submittals.
- Site plan submittal: Civil drawings, traffic data if needed, stormwater approach, and utility coordination.
- Building permit package: Architectural life-safety sheets, structural calculations, mechanical/electrical/plumbing (MEP) basis of design, and vendor-engineered steel package details.
- Special inspections: Identify inspections for high-strength bolting, welding, and steel erection bracing; align the third-party inspector’s schedule with your erection plan.
- Phased approvals: Where allowed, pursue foundations-only or shell-only permits to gain schedule overlap with shop fabrication.
Document who is responsible for each drawing, calculation, and submittal type. When insulated metal panels also serve as air and water control layers, plan for adhesion or fastener inspections per the manufacturer’s instructions. Coordinate fire and life safety narratives with your insurer and authority having jurisdiction; draw clear boundaries for any fire-resistive enclosures, hose valve locations, and fire pump rooms. Good documentation shrinks approval cycles and reduces last-minute questions.
Structural systems and span strategies that fit your operation
Most modular steel shells use one of two structural families—hot-rolled rigid frames or cold-formed (light-gauge) systems—and hybrids are common. Selecting the right approach depends on your spans, clear heights, openings, lateral loads, and process layout.
- Rigid-frame systems: Primary frames use tapered built-up plate sections or wide-flange shapes. They excel at long, column-free spans (80–200 ft), crane loads, and high clear heights. Secondary framing (purlins and girts) is typically cold-formed Z or C members.
- Cold-formed systems: Panelized walls, joists, and trusses built from light-gauge members shine for small to mid-size buildings, frequent openings, and moderate loads. They can install quickly with a high degree of repetition.
Ask suppliers to publish serviceability criteria (e.g., roof deflection limits L/240 vs. L/360), lateral drift limits, and connection strategies (all-bolted or occasional field welds). Clarify corrosion protection: galvanized secondary members are common; primaries are often shop-primed, with hot-dip galvanizing considered in corrosive environments. Verify design is stamped for your jurisdiction and uses the correct load parameters. In high seismic zones, review braced bay locations and collector/drag strut details; in high wind zones, confirm purlin spacing, panel spans, and edge attachment patterns.
Plan special loads early. If you need bridge cranes, specify runway beams, column reinforcement, bumper stops, and cabling pathways in the base package. For monorails, conveyors, or process piping, provide point loads and preferred connection details so the supplier can include pick plates or supplemental members. If mezzanines are in the future, add sleeves or stub columns now to reduce disruption later. Small coordination steps during design can save weeks during buildout.
Envelope assemblies: walls, roofs, openings, and moisture control
Your envelope sets energy use, comfort, acoustics, and appearance for years. Wall options include ribbed single-skin metal with interior insulation, insulated metal panels (IMPs), and framed walls with exterior sheathing, air and water control layers, continuous insulation, and cladding (metal, masonry veneer, fiber-cement, or composites). Roofs typically use through-fastened ribbed panels or standing-seam systems over purlins, paired with layered rigid insulation or IMP roof panels.
Points to compare when selecting assemblies:
- Insulated metal panels: High thermal resistance per inch, continuous air and water control at panel joints, and rapid installation. Pay attention to thermal breaks and trim details at corners and openings.
- Standing-seam roofs: Clip systems accommodate thermal movement, and concealed fasteners reduce exposure. These pair well with above-purlin insulation and clamp-on solar attachments.
- Air and water control layers: In framed walls, a fluid-applied or sheet membrane over sheathing, tied into openings and penetrations, helps limit bulk water and air leakage. With IMPs, joint gaskets and sealants handle that role.
- Acoustics: Where noise matters, consider perforated interior liners with acoustic insulation, or framed cavities with batt plus resilient channels behind finishes.
Climate matters. In snow country, review drifting at step-downs and eaves; coordinate purlin spacing and panel spans accordingly. In high-wind zones, verify clip spacing and attachment patterns, and coordinate parapet or fascia heights with required edge metal. In hot climates, cool roof colors and vented cavities can lower heat gain. Manage penetrations with a running register so curbs and flashing align with purlin spacing and panel ribs; grouping penetrations reduces flashing labor and lowers leak risk. When rooftop units, skylights, or stacks are added later, follow manufacturer details and your original register to keep the roof system coherent.
MEP coordination and fire-life safety integration
Modular steel rewards upfront coordination of mechanical, electrical, plumbing, and process systems. Layouts influence penetrations, curb placement, and panel joint strategies. Electrical gear clearances set by code and manufacturer instructions must coexist with structure and material flows. If your facility includes dust collection, compressed air, or liquid lines, supply design loads and preferred routing so the steel package includes hangers, pick points, or supplemental members where needed.
Fire and life safety begin with occupancy type, contents, and height/area calculations. Light-hazard occupancies often use wet-pipe sprinklers; high-piled storage may require larger mains or specialized systems such as ESFR heads. Some jurisdictions or insurers may call for fire-resistive protection of frames or columns in specific assemblies; options include intumescent coatings, board encasement, or rated partitions that isolate structural elements. Document hose valve locations, standoff distances, and any fire pump room early so civil, architectural, and MEP drawings align. Where smoke control, industrial ventilation, or air balance is important, hold coordination meetings to align exhaust, intake, make-up air, and interlocks with the building shell.
Lighting and daylighting deserve attention in wide-bay buildings. Combine high-efficacy LEDs with skylights or translucent panels in areas where glare can be managed. In high-bay heated spaces, destratification fans reduce temperature stratification. Leave spare conduit paths and space on cable trays for future low-voltage systems and reserve accessible zones near docks for future equipment, conveyors, or robotics.
Foundations, slabs, and anchorage that support modular precision
A well-engineered steel kit still relies on a stable base. Geotechnical findings drive whether you use shallow spread footings and a slab-on-grade, or opt for drilled piers, augercast piles, or ground improvement. Frost depth and soil heave potential influence thickened-edge slabs, grade beams, and subbase prep. Coordinate the foundation plan tightly with the anchor-bolt plan, and use supplier templates for accurate placement.
Focus quality control on details that are costly to fix later:
- Anchor rods: Verify patterns, edge distances, embedment depths, and elevations before concrete placement. Use leveling nuts and grout to achieve uniform bearing under base plates.
- Slab criteria: Define flatness and levelness (FF/FL) that fit equipment needs. Laser screeds and early-entry saw cuts can help manage shrinkage cracking.
- Moisture and vapor control: In conditioned spaces, use a robust vapor retarder with lapped and taped seams. Coordinate sleeves and penetrations to reduce unplanned cuts after the pour.
For heavy rack legs, column line traffic, or robotic cells, consider local thickening or additional reinforcement. If you anticipate future mezzanines or platforms, embed plates or sleeves during the initial pour. A clean foundation set, paired with accurate anchor bolt layout, keeps the crane moving when trucks arrive.
Procurement strategies and vendor vetting
Several procurement models work well with modular steel. The common element is early clarity on loads, spans, openings, envelope performance, and schedule constraints. Three models dominate:
- Design–bid–build with a pre-engineered package: The A/E team writes performance specs; multiple suppliers price the steel frame and envelope; the general contractor (GC) contracts fabrication and erection.
- Design–build: A single entity integrates design, steel supply, and erection, which can compress cycles and simplify change management.
- CM at risk or negotiated GMP: Early builder involvement supports long-lead procurement and budget validation before full construction documents are complete.
Qualify vendors on engineering depth, schedule reliability, capacity, and familiarity with your code environment. Ask for sample calculations sealed for your state, fabrication certifications (AISC or IAS), galvanizing or coating partners, and documented QC procedures. Clarify deliverables such as shop drawings, anchor-bolt plans, erection bracing schemes, torque/tension records, and as-builts. Tie submittal milestones to foundation pours and crane dates so nothing idles. For a curated hub of products and structure guidance, explore Commercializr.
Logistics, erection sequencing, and site safety coordination
Schedule wins come from simple, repeatable logistics. Create a receiving plan that aligns deliveries with crane availability, and stage bundles in the laydown area to match bay-by-bay erection. If frames or panels exceed legal lengths, coordinate escorts and delivery windows. Prepare compacted, drained laydown pads and a level crane pad, and mark utility no-go zones before trucks roll.
Hold a pre-erection meeting to finalize rigging, temporary bracing, fall protection anchor points, and sequence by bay. Re-check anchor-rod locations and elevations; a quick template verification beats field fixes later. During erection, set primary frames, add secondary members for stability, and get roof panels on quickly to achieve partial dry-in. Keep touch-up paint and coating repair kits on hand; document every location for field-applied fixes so corrosion protection remains continuous.
Good sequencing keeps trades productive. Once a portion of the roof is installed and safe access is available, interior slab prep, rough-ins, and equipment pad work can begin while wall panels continue. Use a running punch list and daily photos to document progress and reduce backtracking. In variable weather, build float around critical lifts and wind-sensitive panel installation.
Budgeting and value decisions that move the needle
Markets shift, but certain cost drivers are stable. Think in three buckets: structure, envelope, and site. Long, column-free spans and higher clear heights add steel tonnage; crane loads and seismic category can shift member sizes. On the envelope, insulation strategy (blanket vs. IMP), roof type (through-fastened vs. standing seam), and the number and size of openings move cost meaningfully. Site scope—foundations, paving, utilities, and stormwater—often equals or exceeds the steel package in cost, so capture those items early.
Value decisions that frequently pay off:
- Grid tuning: Adjust bay spacing to align with efficient purlin, joist, and deck spans. Small spacing changes can reduce member count or weight.
- Roof choices by climate: In mild regions, a through-fastened system with robust underlayment may meet goals; in harsher climates, standing seam can reduce callbacks and long-term roof care.
- Insulation right-sizing: Use energy modeling or prescriptive code paths to hit thermal targets without overspending.
- Penetration planning: Group rooftop units and stacks to simplify flashing and labor and lower leak risk.
- Openings rationalization: Standardize door and window sizes where possible to avoid custom fabrication premiums.
Build the total cost picture: foundations, erection, MEP systems, paving, utilities, stormwater, and soft costs (design, testing, fees, and inspections). Carry allowances for long-lead equipment, realistic contingencies, and escalation if your schedule crosses pricing windows. When bidding, request alternates that help you compare apples to apples—galvanized secondary framing vs. primed, IMPs vs. framed walls with continuous insulation, or standing seam vs. through-fastened roofs with upgraded underlayment.
Sustainability, comfort, and electrification readiness
Steel’s recyclability pairs well with high-performance envelopes and efficient systems. If your organization tracks measurable performance, consider strategies that add comfort while lowering energy bills:
- High-performance walls and roofs: IMPs or framed walls with continuous exterior insulation and a tested air layer reduce thermal bridging and conditioned air leakage.
- Daylighting with controls: Clerestories, skylights, or translucent wall panels paired with occupancy/vacancy and daylight sensors lower lighting loads.
- Ventilation quality: Balanced ventilation and filtration support steady indoor air conditions in shops and courts. In high-bay spaces, destratification fans even out temperatures.
- Solar-ready roofs: Standing-seam systems accept clamp-based PV attachments without penetrating the weather surface; confirm purlin spacing and clip capacity for arrays.
- Electrification readiness: Provide service capacity and conduits for EV charging, future air-to-air or air-to-water heat pumps, and potential all-electric process loads if those are part of your roadmap.
Comfort involves more than temperature. Acoustic treatments, glare control, and straightforward controls matter for occupant satisfaction. If you lease, these features help attract and retain tenants—and may justify modest rent adjustments linked to operational value.
Quality control, documentation, and closeout
Documenting what you built makes operations smoother. Keep shop drawings, anchor-bolt plans, coating data sheets, and panel maintenance guides accessible. Record roof and finish warranties with their terms and care requirements. Use a shared repository so field staff, service vendors, and management can find information quickly.
During construction, focus inspections on high-impact items:
- Steel: Verify bolt grades, nut orientation, snug-tight or tensioned conditions per spec, and any required slip-critical joints.
- Coatings: Touch up shop primer and galvanizing promptly at cuts or abrasions; log locations of field-applied coatings.
- Envelope: Confirm panel lap details, fastener spacing, and joint sealants; water-test selected transitions where feasible.
- Roof: Check clip spacing, seam engagement, and perimeter edge metal attachment. Create a penetrations register with photos before equipment is set.
At closeout, walk the roofs, gutters, and downspouts with the installer, review O&M manuals, and schedule first-year maintenance reminders. Accurate as-builts and a simple maintenance plan improve long-term performance and reduce callbacks.
Maintenance routines that extend service life
Modular steel buildings age well when owners adopt a light but consistent care routine. Create a maintenance playbook and train staff to run it:
- Seasonal roof walks: Clear debris, check fasteners, examine transitions, and log any coating nicks for touch-up with the manufacturer-recommended system.
- Drainage checks: Keep gutters and downspouts open; verify splash blocks or tight connections to storm piping so water sheds correctly away from foundations.
- Envelope inspections: Look for dented panels, loose fasteners, oxidation, or joint sealant wear—especially at corners and around openings.
- Structure observations: Watch for unusual deflection or vibration that hints at load changes. Address issues early with a qualified professional.
- Door and dock gear: Lubricate moving parts, check seals, and confirm safety interlocks function as designed.
Budget for periodic re-sealing of standing-seam transitions and repainting or recoating when gloss loss or chalking first appears. Small, early fixes typically cost much less than deferred repairs. When changes occur—new rooftop units, interior partitions, or mezzanines—update as-builts so the next project starts with reliable information.
Common pitfalls and practical workarounds
Even experienced teams run into repeat issues. Anticipate these pitfalls and adopt practical countermeasures:
- Underspecified openings: Late changes to dock positions or door sizes ripple into structure, paving, and utilities. Freeze opening types and heights early and provide dimensional tolerances in the documents.
- Penetrations chaos: Rooftop equipment added without a plan complicates flashing and raises leak risk. Maintain a penetrations register; group curbs where possible; coordinate with purlin spacing.
- Misaligned anchor bolts: Incorrect bolt patterns or elevations slow the crane and force field rework. Use templates and inspect before pours; if errors occur, engage engineering quickly for a correction path.
- Unclear air and water control layers: If drawings fail to show continuity, trades may leave gaps. Trace the control layer on details; require mockups for critical transitions.
- Overcustomization: Unique bay sizes and special trims add cost and lead time. Standardize where possible and save custom efforts for the highest-value areas.
- Underestimating site scope: Stormwater, utilities, and paving costs can exceed the steel package. Build site budgets early with allowances for unknowns.
A short risk register helps: list the top five uncertainties, each with a mitigation step, trigger to revisit, and a single owner. Review it at weekly meetings to keep attention on what moves schedule and cost.
A sample delivery sequence you can adapt
No two projects are identical, but a clear sequence reduces churn. This high-level timeline has worked for many teams; adapt it to your jurisdiction and program:
- Weeks 0–2: Draft OPR; run the pre-app meeting; order geotechnical borings; start survey.
- Weeks 3–6: Confirm code parameters; issue schematic site and floor plan; solicit budget pricing from two steel suppliers and the GC or CM.
- Weeks 7–10: Submit site plan; release steel for engineering; coordinate foundations and anchor-bolt plan; begin civil drawings for permitting.
- Weeks 11–14: Submit building permit package; finalize envelope assemblies; release long-lead MEP gear; lock opening schedule.
- Weeks 15–18: Pour foundations; verify anchor rods; begin fabrication; book crane and delivery windows.
- Weeks 19–24: Erect frames and secondary members by bay; set roof panels; achieve partial dry-in; begin slab prep and interior rough-ins in safe areas.
- Weeks 25–30: Install wall panels and openings; set rooftop units; complete slab pours; continue MEP rough-ins; perform targeted envelope water testing.
- Weeks 31–36: Finish interiors, paving, and sitework; complete commissioning; compile O&M manuals; schedule final inspections and occupancy.
Hold short coordination meetings at each phase boundary to assign owners, confirm decisions, and adjust for supply chain changes. Many teams also include float around critical lifts or seasonal weather.
Where modular steel shines—and where to be cautious
Modular steel shines when your program benefits from clear spans, repetitive bays, fast enclosure, and straightforward finishes. It aligns well with logistics centers, light manufacturing, and recreational facilities where the shell is functional, durable, and configurable. It also supports future growth through planned expansion bays and removable cladding.
Be cautious when your program relies on highly irregular massing, extensive cantilevers, or complex fenestration patterns that fight the efficiencies of standardized members. Those goals can still be met, but they take more custom engineering and may reduce the speed and cost advantages of modular kits. In these cases, a hybrid approach—combining a modular core with custom steel zones—can preserve value while achieving the desired form.
Final checklist for decision-makers
Use this concise checklist to confirm readiness before releasing steel for engineering and fabrication:
- OPR finalized with clear height, bay spacing, openings, roof/floor loads, and any special loads.
- Code parameters documented (IBC edition, ASCE 7 loads, seismic category, wind exposure) with local amendments.
- Geotechnical report in hand; foundation strategy chosen; anchor-bolt plan coordinated.
- Envelope assemblies selected with details for air and water control continuity; penetration register started.
- MEP basis of design aligned with structure; process loads and hangers identified.
- Procurement model chosen; vendor qualification complete; submittal milestones aligned to pours and crane dates.
- Logistics and erection sequencing drafted; crane pad and laydown areas planned.
- Budget alternates defined; contingencies and escalation carried; long-lead items released.
- Closeout documentation plan in place (warranties, O&M manuals, as-builts), with first-year maintenance reminders scheduled.
With these items squared away, your team is positioned to execute smoothly, reduce field confusion, and deliver a building that works on day one while staying adaptable for the long haul.